Printing isn’t an exact science because printing machines aren’t perfect. What do we mean? Well, during the printing or cutting process, paper can still move around and shift. Of course, we’re talking in millimeters and while this may sound minuscule and almost inconsequential, for print projects that have art or color that extend all the way to the edge of the paper, this is a big deal.
How big of a deal? It could mean having a finished print product that has a white border all the way around or worse yet, your product could have art or copy that is cut off. Yikes, right! But don’t worry, you can prevent all of this from happening if you account for bleeds and margins.
These terms probably sound like something out of a horror movie if you’re not a professional graphic designer. But you should have a basic understanding of what they are and why they’re important to producing the best print products or print marketing especially when you’re submitting your final art files via an online, print on-demand platform.
Definitions
Bleed: The extra .0625" on each side of your artwork that bleeds off the edge of the piece and ensures your piece will not end up with white borders.
Trim: The final size the printed piece will be.
Safe: The .0625" area from the final trim size. Do not place text or important imagery beyond the safe line to avoid it getting cut off when the finished piece is trimmed to final size.
The Need for Bleed
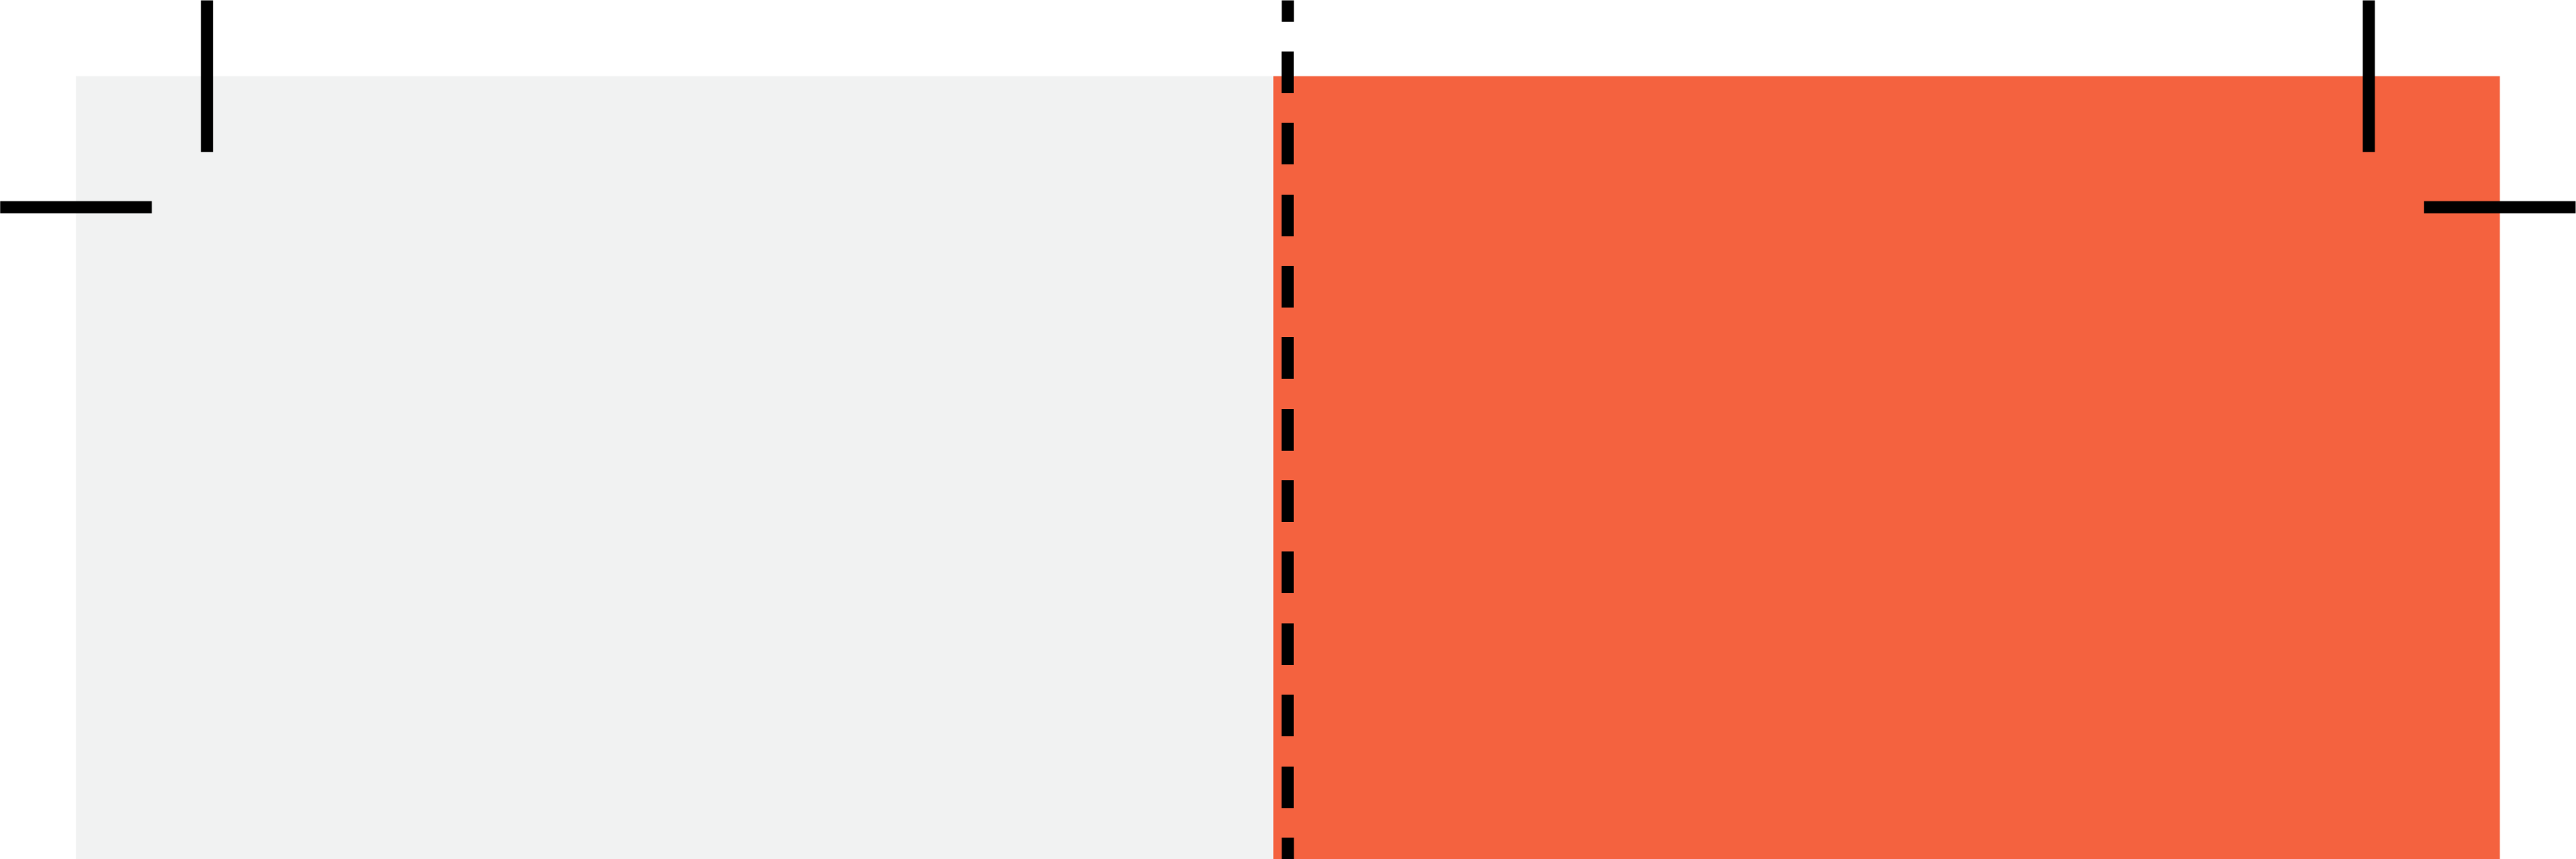
I know this may sound scary, but when we talk about bleeds, we’re using the term to describe how artwork extends past the cut line – it “bleeds” past the edge. By extending the art past the cut line in your artwork, it allows our cutters to trim off that extra artwork and provide a nice clean edge where the artwork goes right up to it. Not providing a bleed can result in unsightly, thin white borders around the edge of your piece.
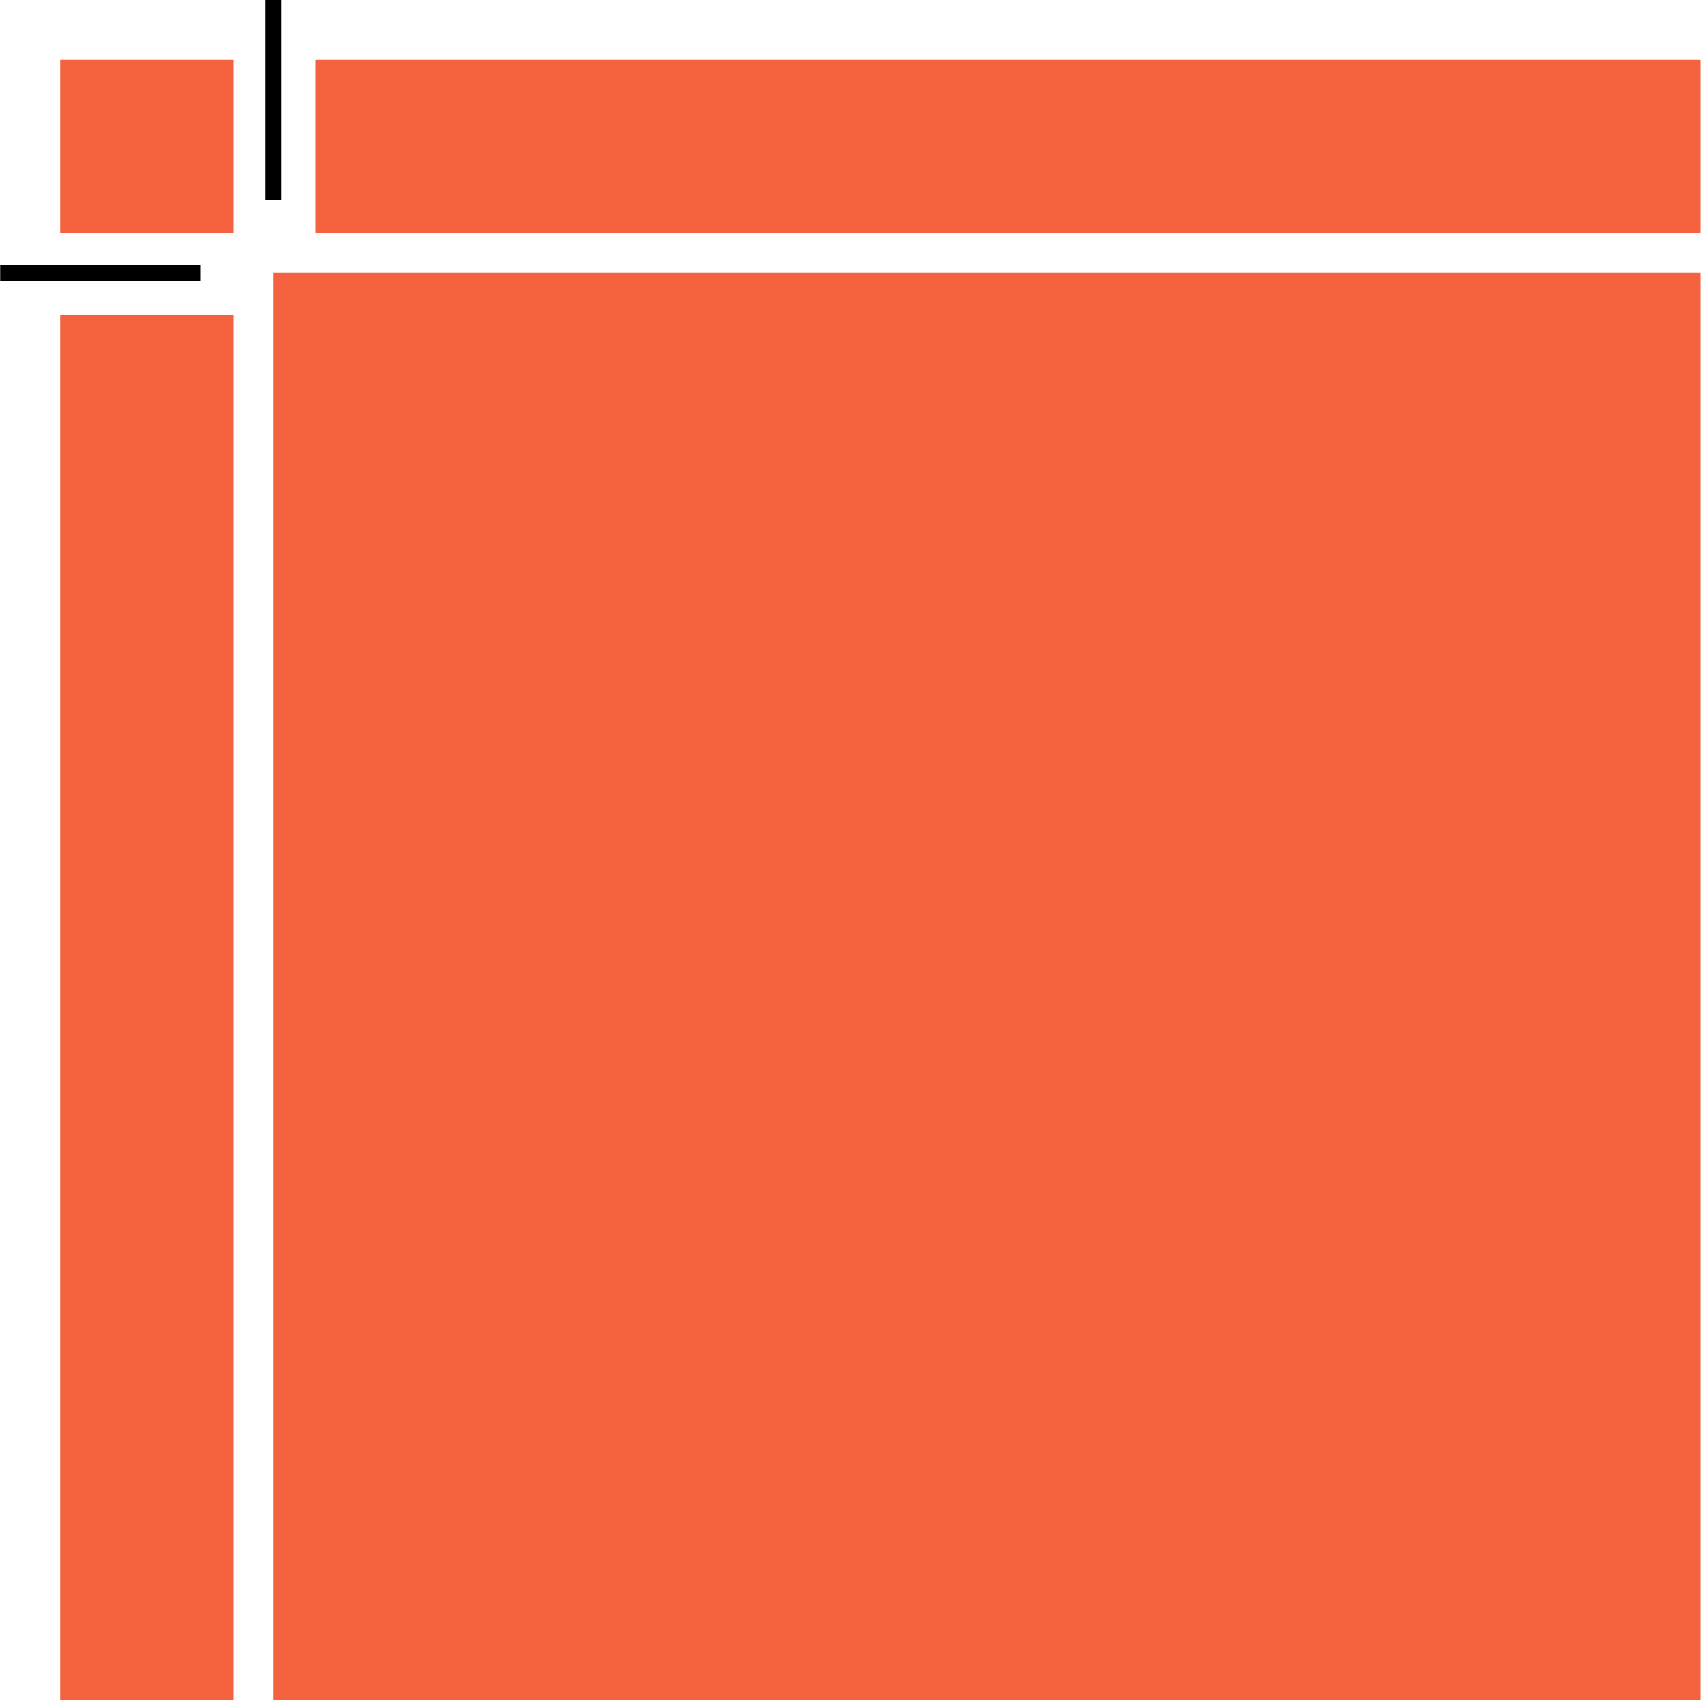
A piece with proper bleeds
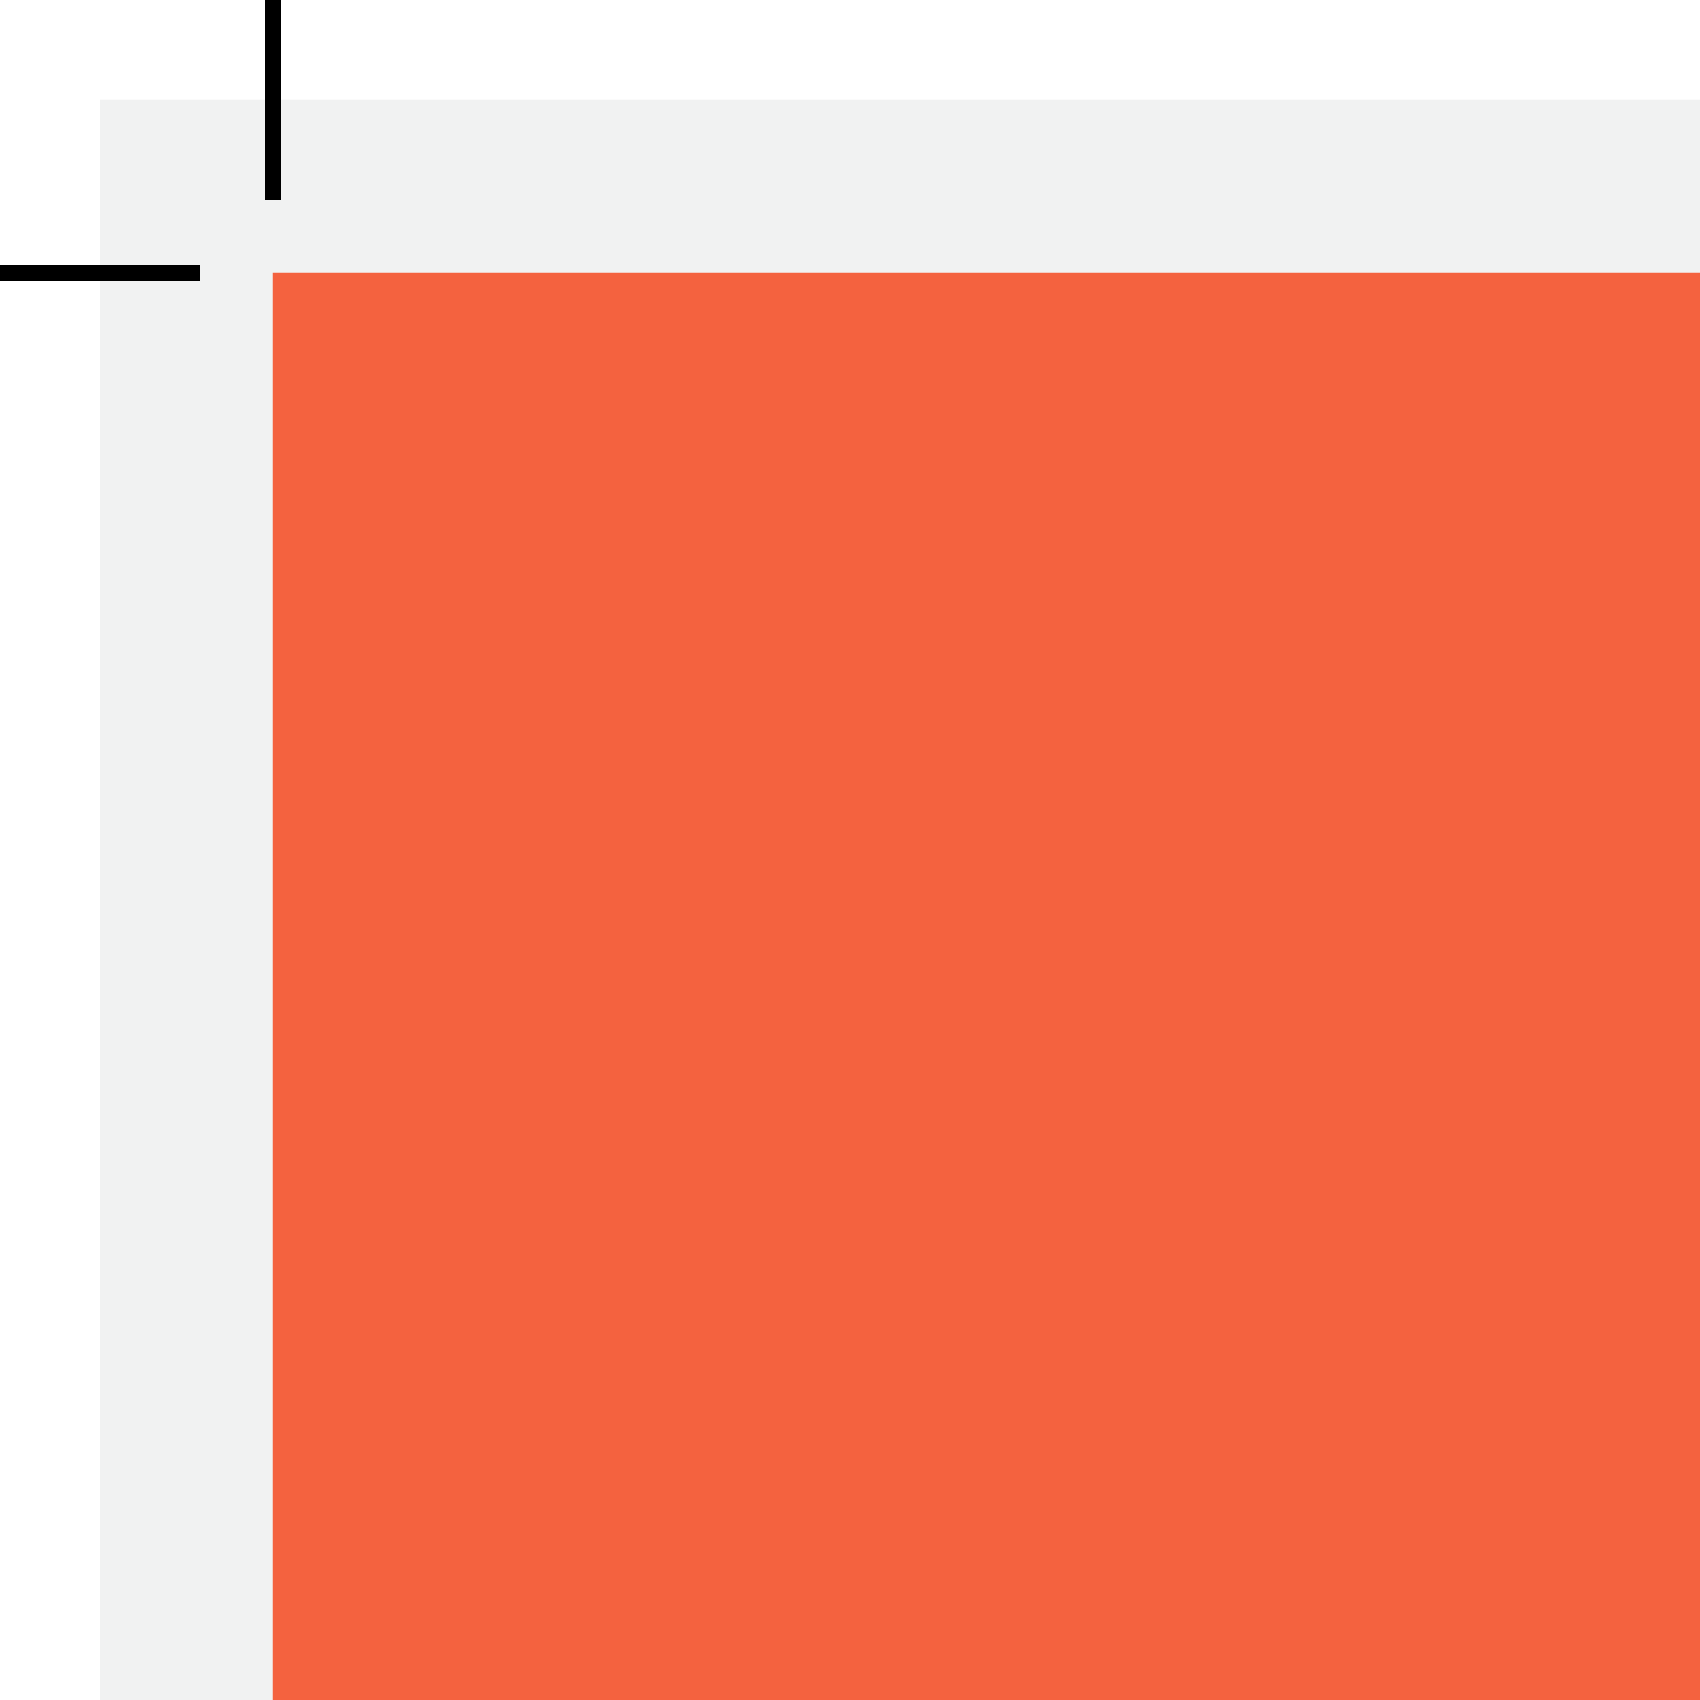
A piece with bleeds after being cut
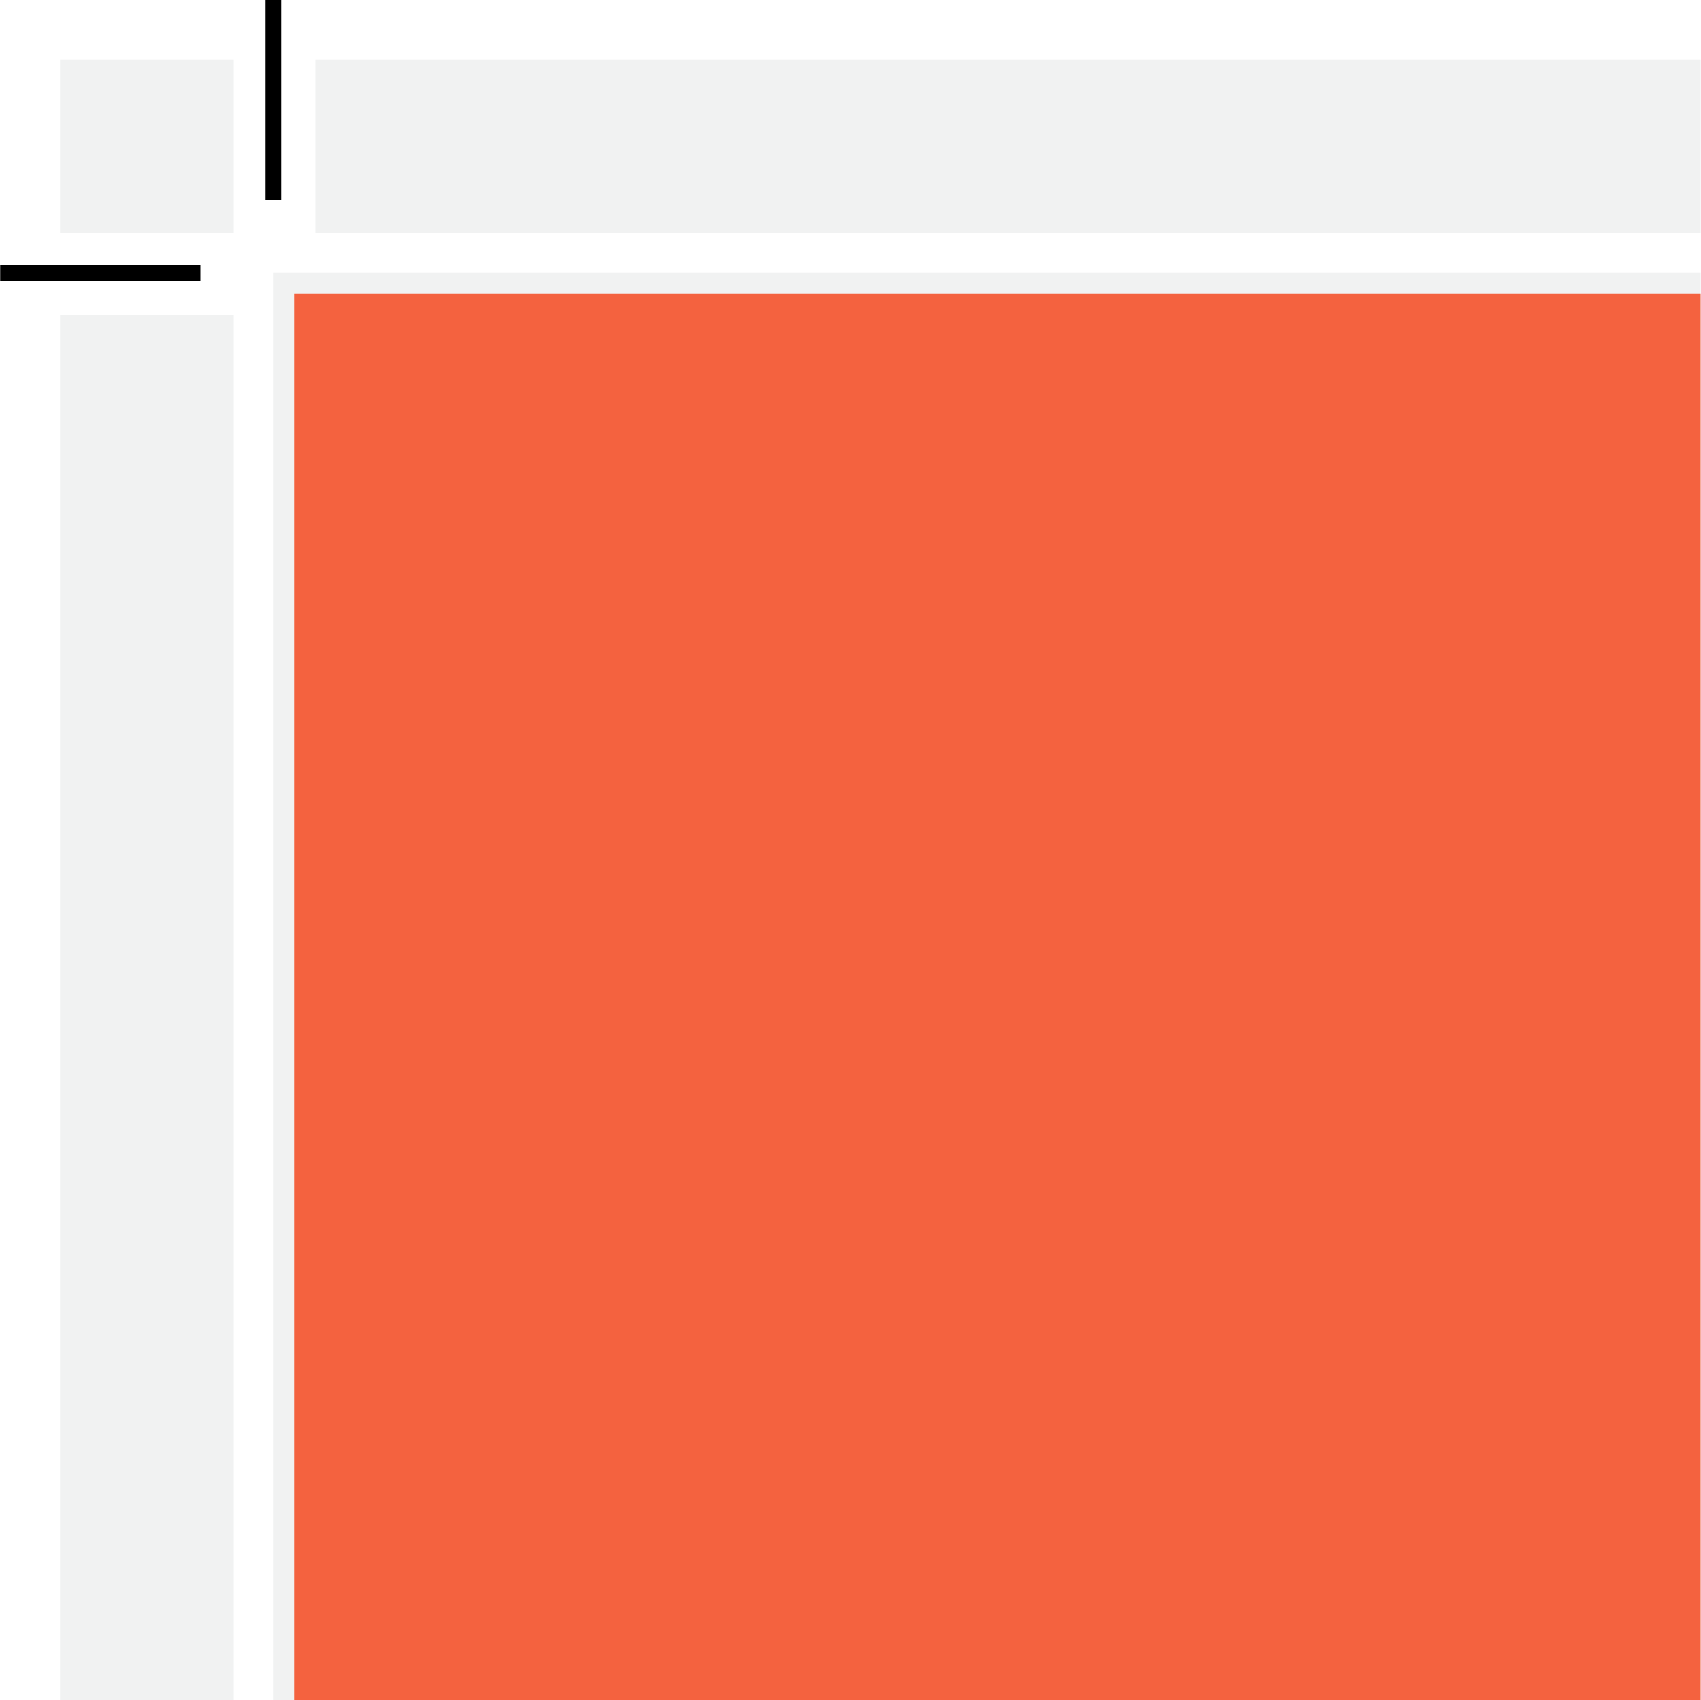
A piece WITHOUT bleeds
A piece WITHOUT bleeds after being cut
| A piece with proper bleeds | A piece with bleeds after being cut | A piece WITHOUT bleeds | A piece WITHOUT bleeds after being cut |
In some instances, a bleed may not be necessary, primarily if your artwork doesn’t extend to the edge of the piece. Consider a business card design that features a logo in the top left corner, and contact details in the bottom right corner, with a simple white background, in this instance we’re not printing any ink to the edge, so there’s no need for a bleed (though it doesn’t hurt to include the extra space anyway).
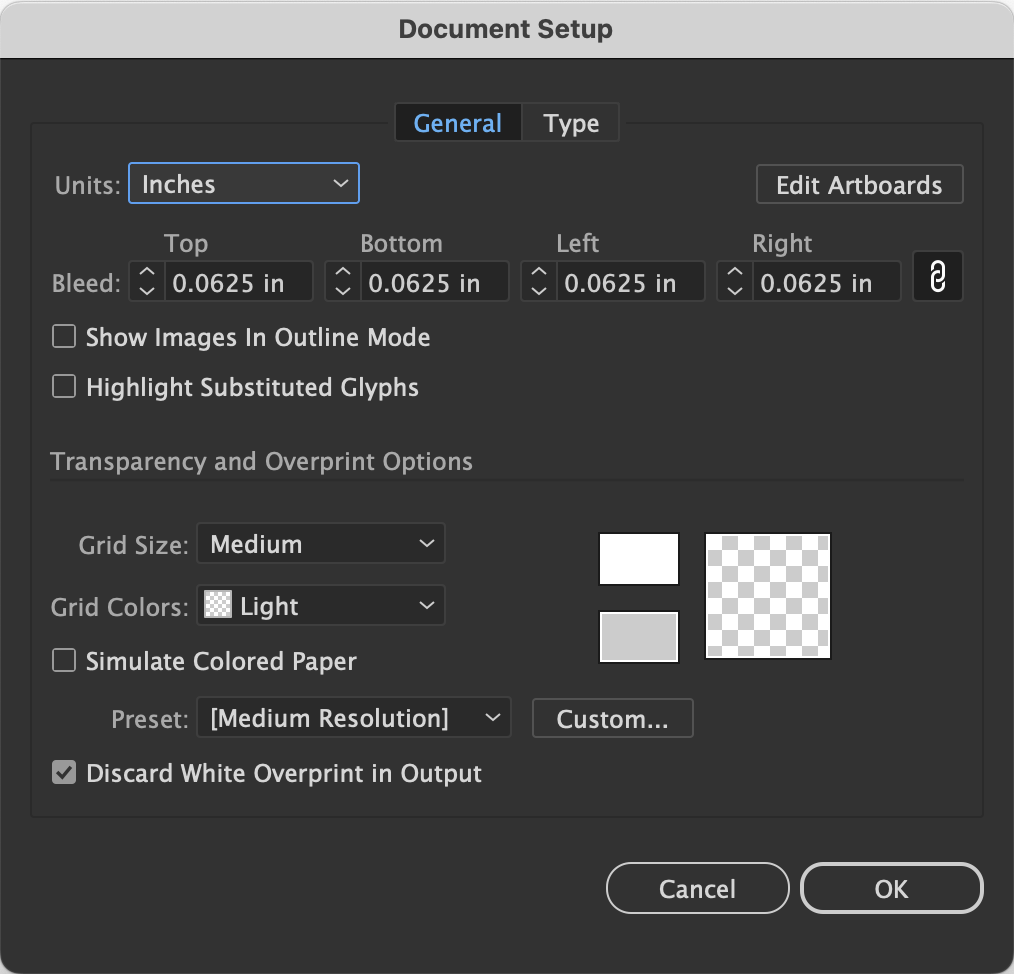
Bleeds are important to consider and include when the situation calls for it, but how much extra artwork are we talking about? I’m so glad you asked. For digital printing, printers may require 1/16” (0.0625”) of extra artwork on each edge of the document, with offset printing typically needing a bit more than that, usually about 1/8” (0.125”). Bleeds can be set up during document creation in Illustrator and InDesign. Photoshop is different in that it’s meant for photo manipulation, but, if necessary, it’s best to just add extra canvas to a Photoshop document. Another important reminder is to make sure that the PDF output includes document bleeds. The “press quality” preset in Illustrator and InDesign should include this setting by default.
Make the Cut
The cut line is self-explanatory, it’s the line where printers plan to cut the piece; this will be more or less accurate depending on the equipment used. Printers have large straight edge cutters for banners, guillotine cutters for most smaller format jobs, and die cutting for commonly used sizes like business cards.
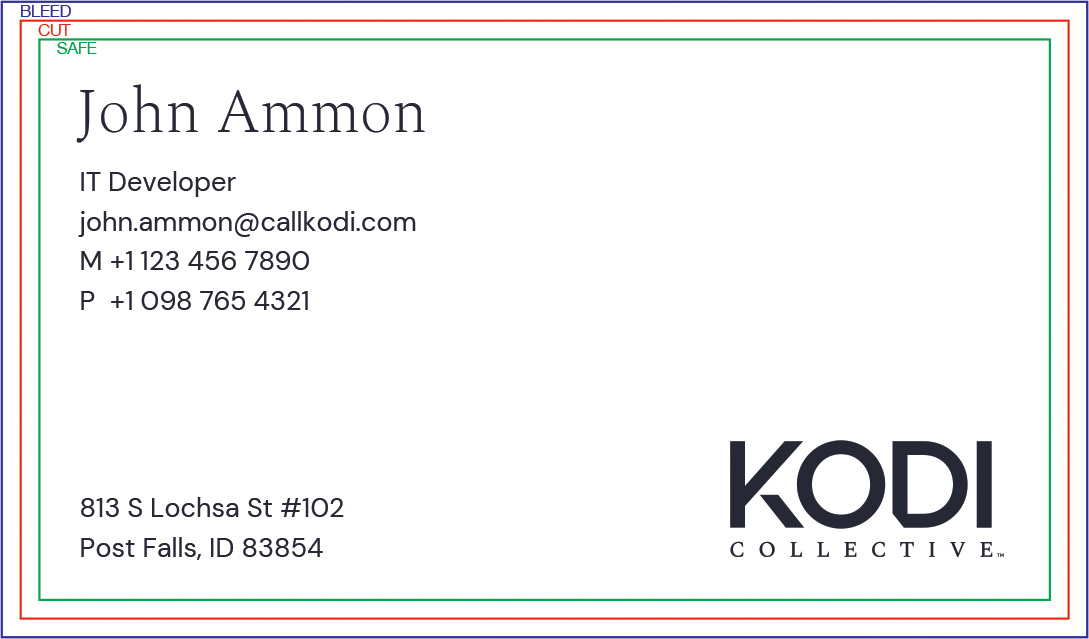
The front of a business card, the text is well inside the safe line
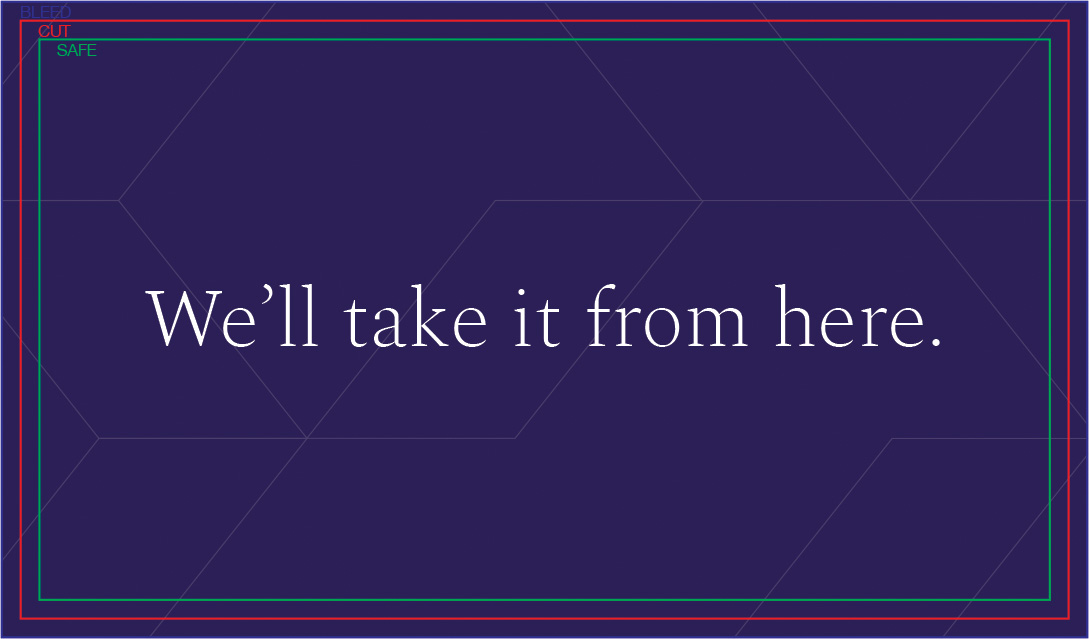
The back of a business card, the bleed extends all the way to the bleed line
The real trick to a good cut is making sure that your content is a fair distance away from the cut line, a printer may require a minimum of 1/16” spacing from the cut line, also called the safe line. The more space you have in this area, the better, but 1/16” (0.0625”) is typically the bare minimum.
It’s important to note that because of possible small shifts in the print and cutting process, printers can’t guarantee perfectly equal sizing around each edge, for this reason we caution against putting borders around the edge of your artwork to avoid uneven-looking artwork in the final product.
Put Your Backbone Into It
When it comes to folds, it’s important to remember that while printers strive for the best possible fold every time, again nothing is perfect. Sometimes the fold on the spine will not perfectly match artwork that ends at the front cover and does not continue onto the back of the piece. For this reason, we recommend either covering the front and back of the folded piece with the same artwork or adjusting the line on the spine to bleed onto the back cover by at least 1/16” (0.0625”) to avoid that dreaded white border line on the spine edge of the front of the card.
Print on Your Terms
At Kodi Collective, we believe digital printing when you need it isn’t a luxury – it’s a necessity. Our print on-demand platform, Print.CallKodi.com, is a powerful tool that can level the playing field, giving your business a chance to standout through quality, top-notch print. We are a printing services provider with a national footprint and over 150 years of expertise working with brands both large and small. Our experts are here to help your business succeed by delivering the highest-quality print products, on time, every time, when you need it most. Call Kodi…we’ll take it from here.